
Photoshop Trick: Crop Images Based on Orientation
Images are key to any website, and they are even more critical to portfolios, as they showcase expertise and keep users engaged. As for a designer, cropping and resizing hundreds of images is time-consuming. If the client provides images with the same orientation, you can easily record your action in Photoshop for that specific orientation. But that’s not always the case; images come in different shapes and sizes. This custom Photoshop script will allow you to automate folders with hundreds of images, cropping them to size depending on orientation.
Creating an Image Crop Automation Based on Image Orientation in Photoshop
Creating the JavaScript Code
Before diving into Photoshop, we have to create a JavaScript file that Adobe Photoshop can read and automate. This process is slightly different for Mac and Windows.
Step 1: Open Text Editor
Open your system’s text editor, whether it’s TextEdit (macOS) or Notepad (Windows).
Paste the JavaScript code above into your text editor.
Note: If you want to change the dimension and resolution of the image, you can change it under the section “Define target dimensions and resolution.”
Step 3: Export and Save JavaScript Code
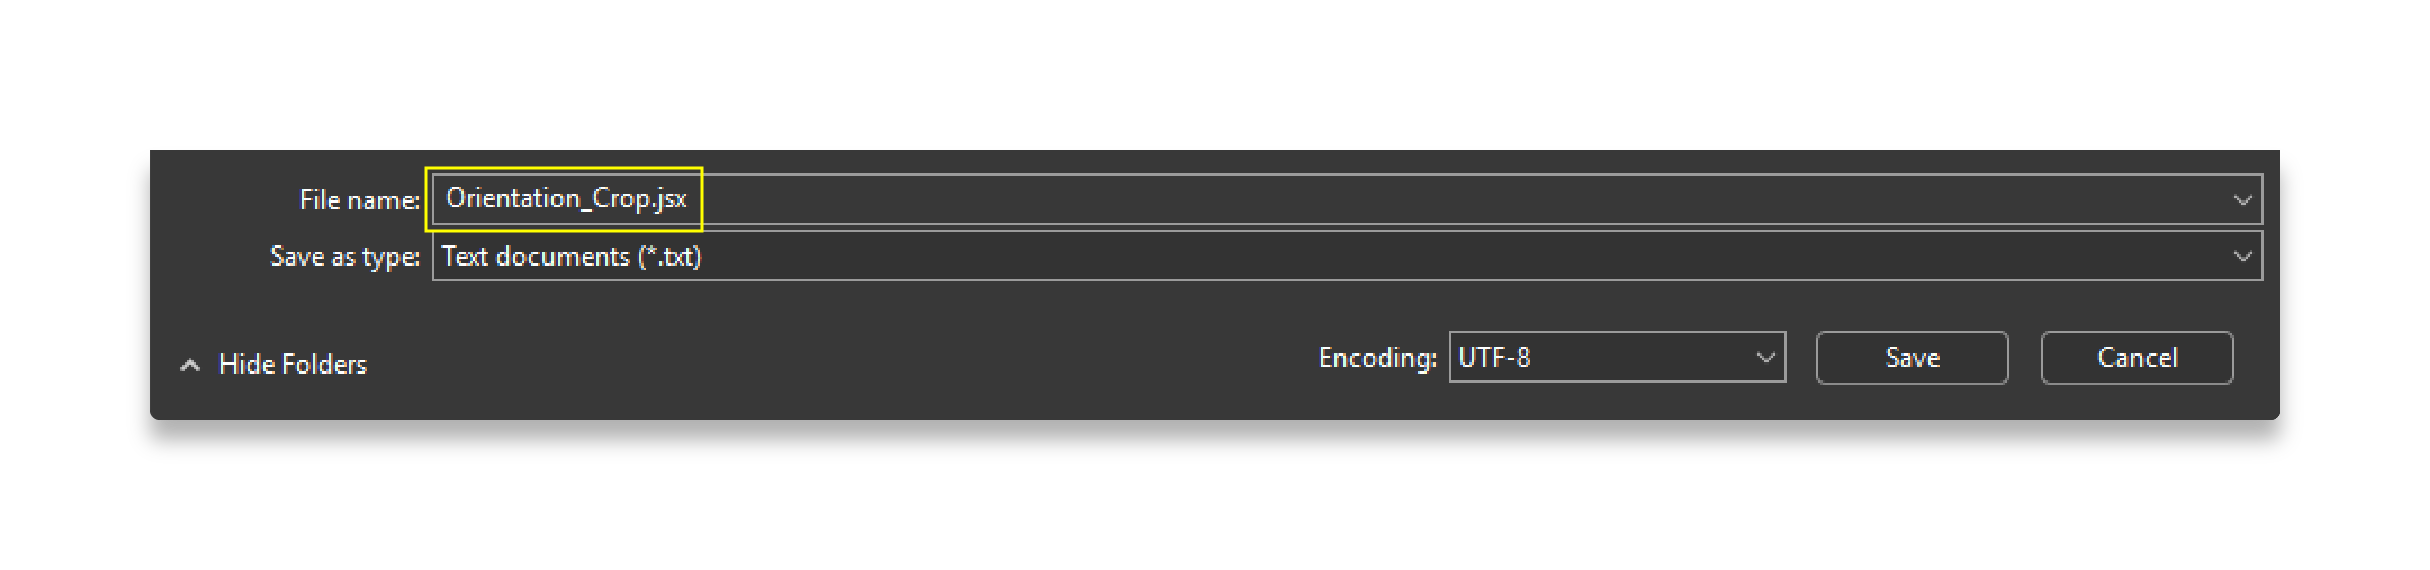
Once the script is entered, you have to save the code as JavaScript code (.jsx). Make sure to add the suffix ‘.jsx,’ Photoshop will recognize the JavaScript file and run the code during batching process.
Creating an Action Recording
Step 1: Create a New Recorded Action
Once you have finished saving your JavaScript file, head over the Adobe Photoshop.
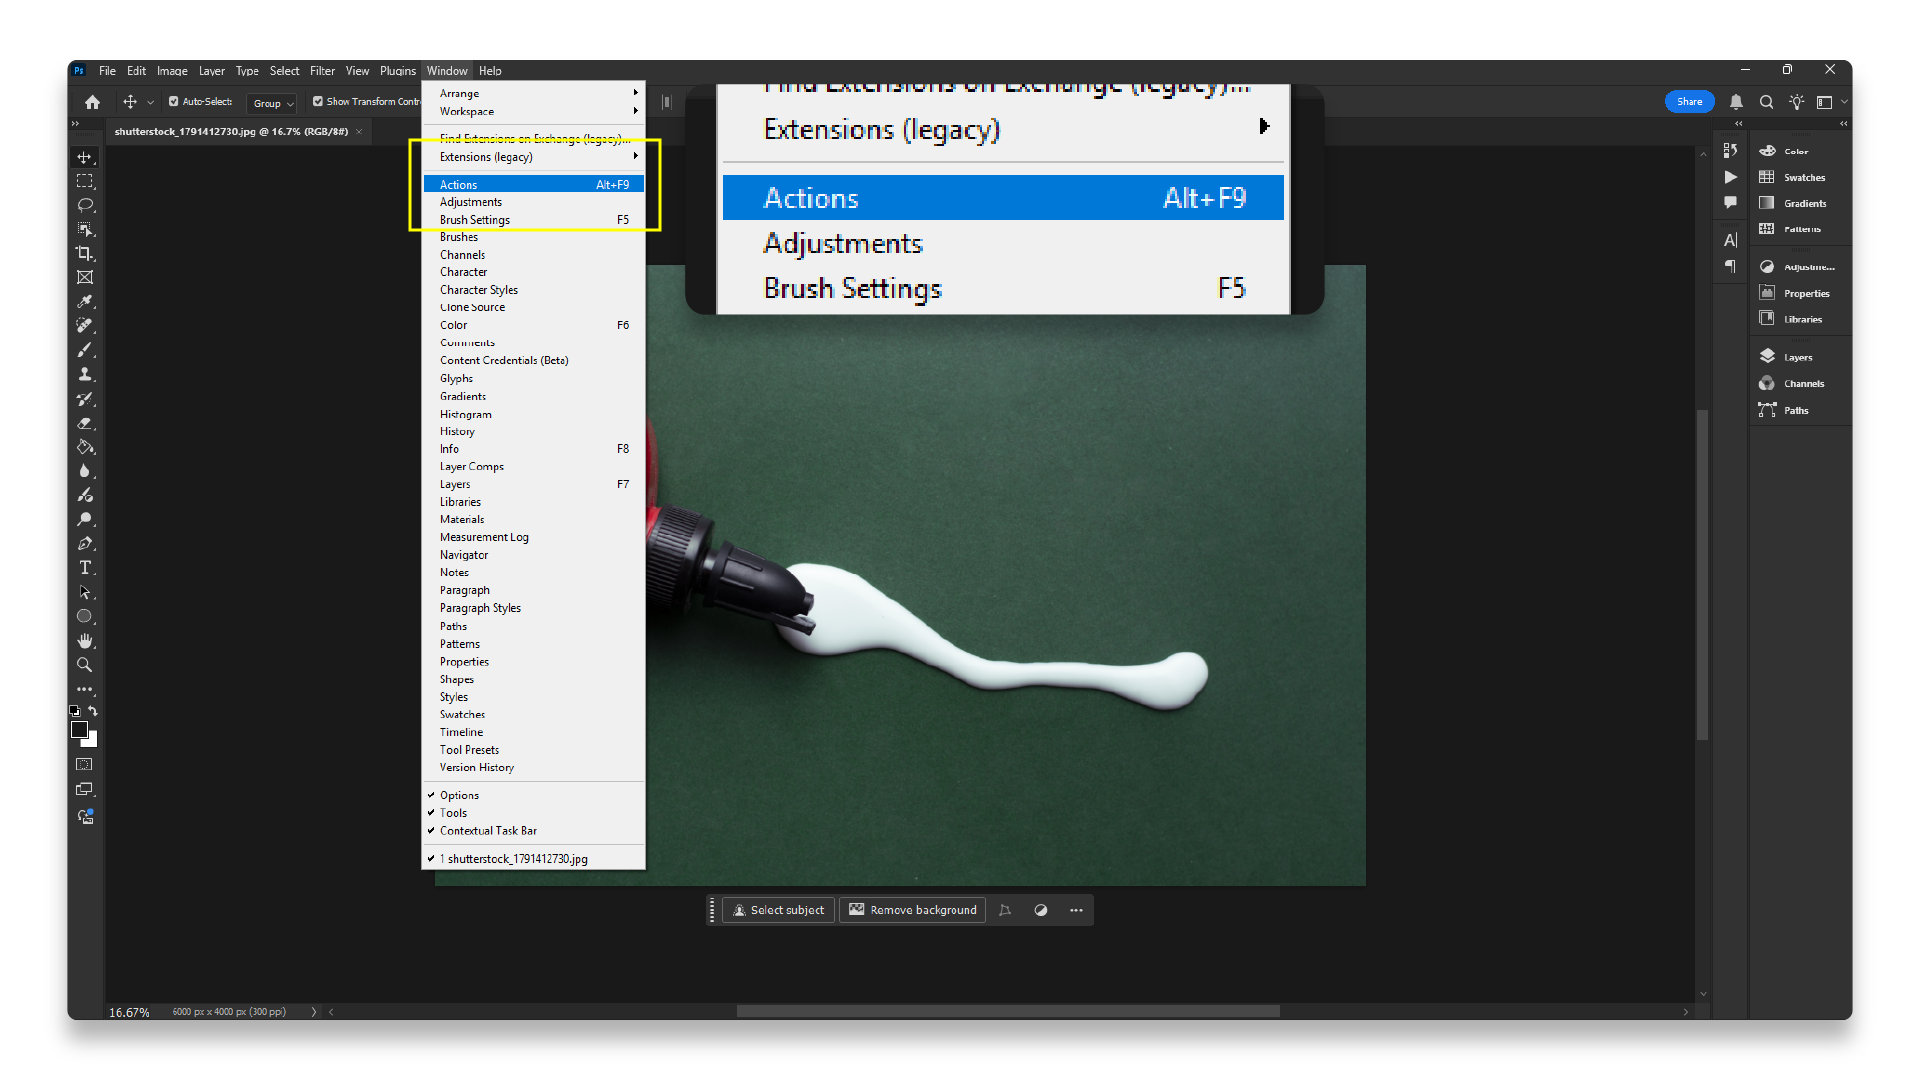
To create an automation, you’ll first have to create an action recording of you running the JavaScript code. For this, open the Actions panel under Window > Actions.
Keyboard Shortcut: F9 (Windows) or Option + F9 (macOS).
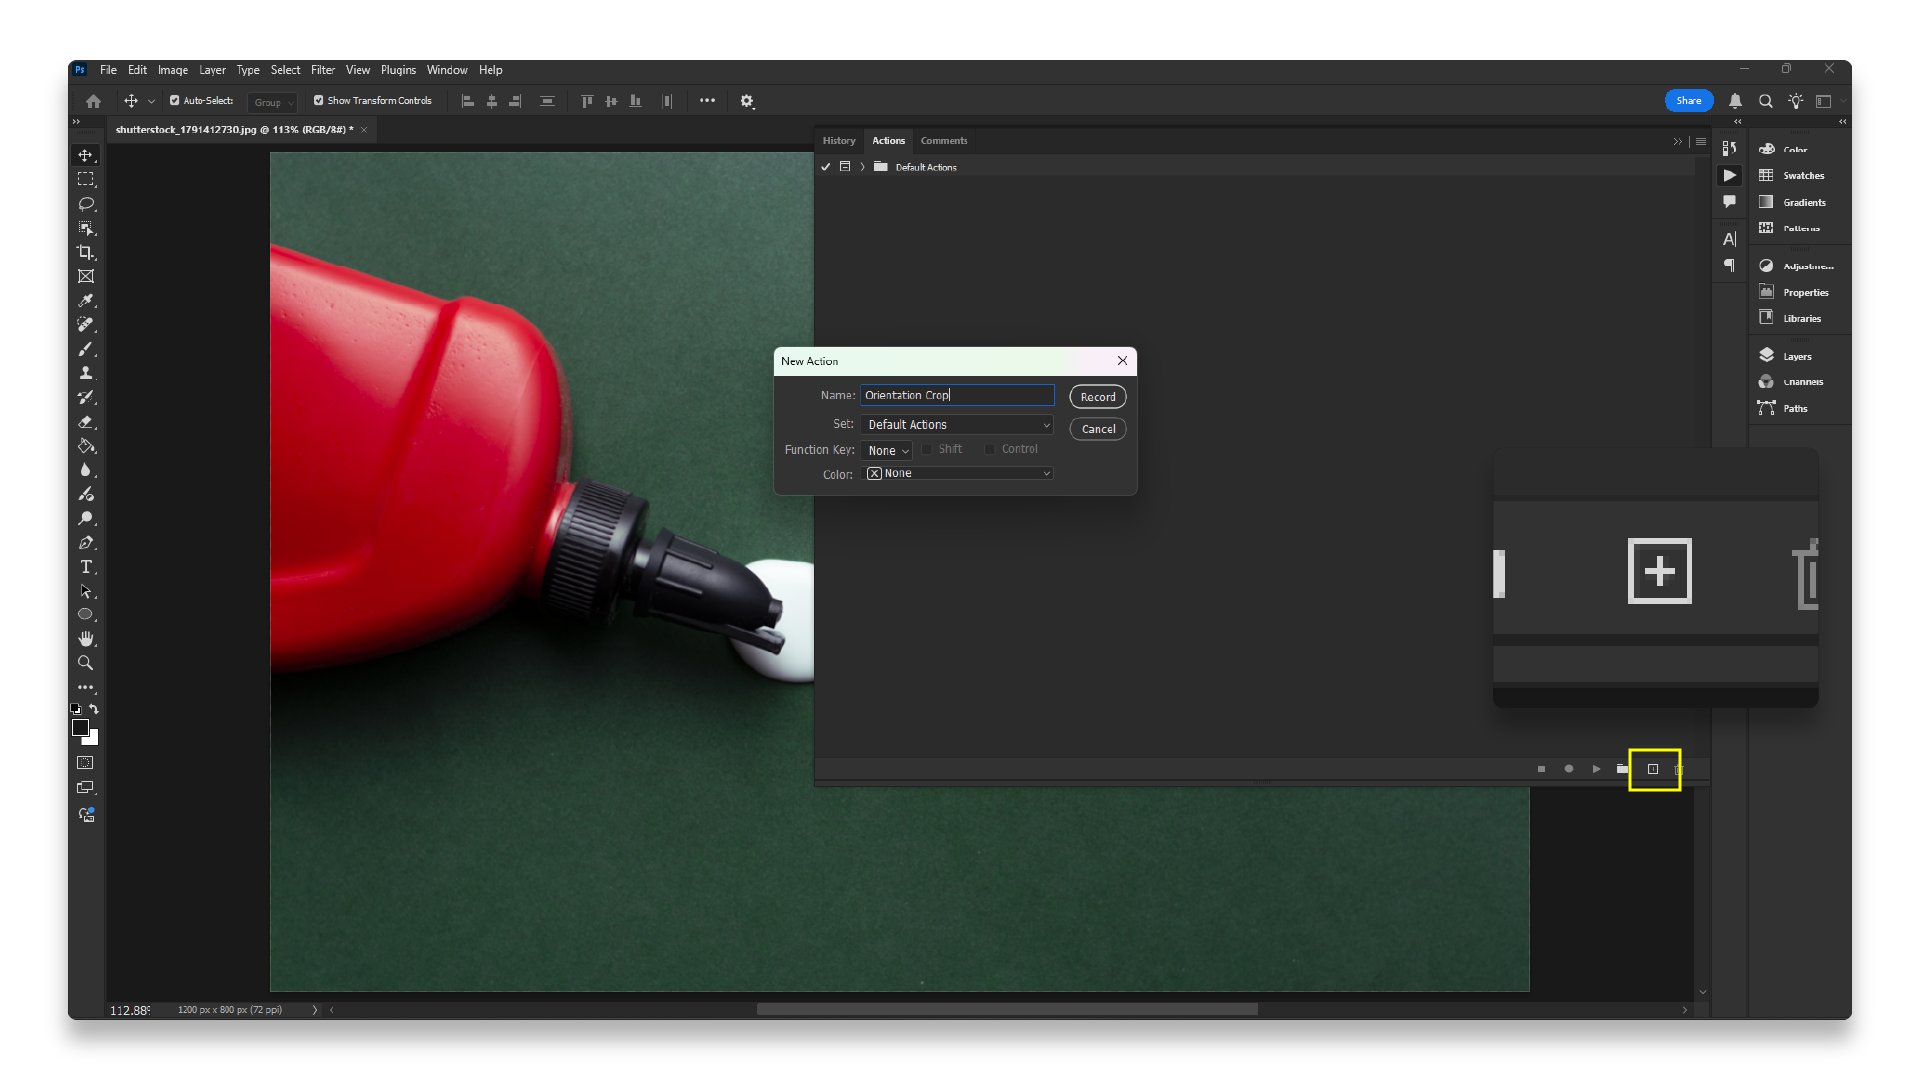
Next, create a new action. Click on the plus icon in the action panel. Then a pop-up should appear, name your action, and click record.
Note: You’ll know that your actions are being recorded when the record icon turns red.
Step 2: Run JavaScript
Once you have begun recording, go to File > Scripts > Browse. From there, find the code file that you saved and click “load.” After the script is loaded, your image will be cropped based on its orientation. 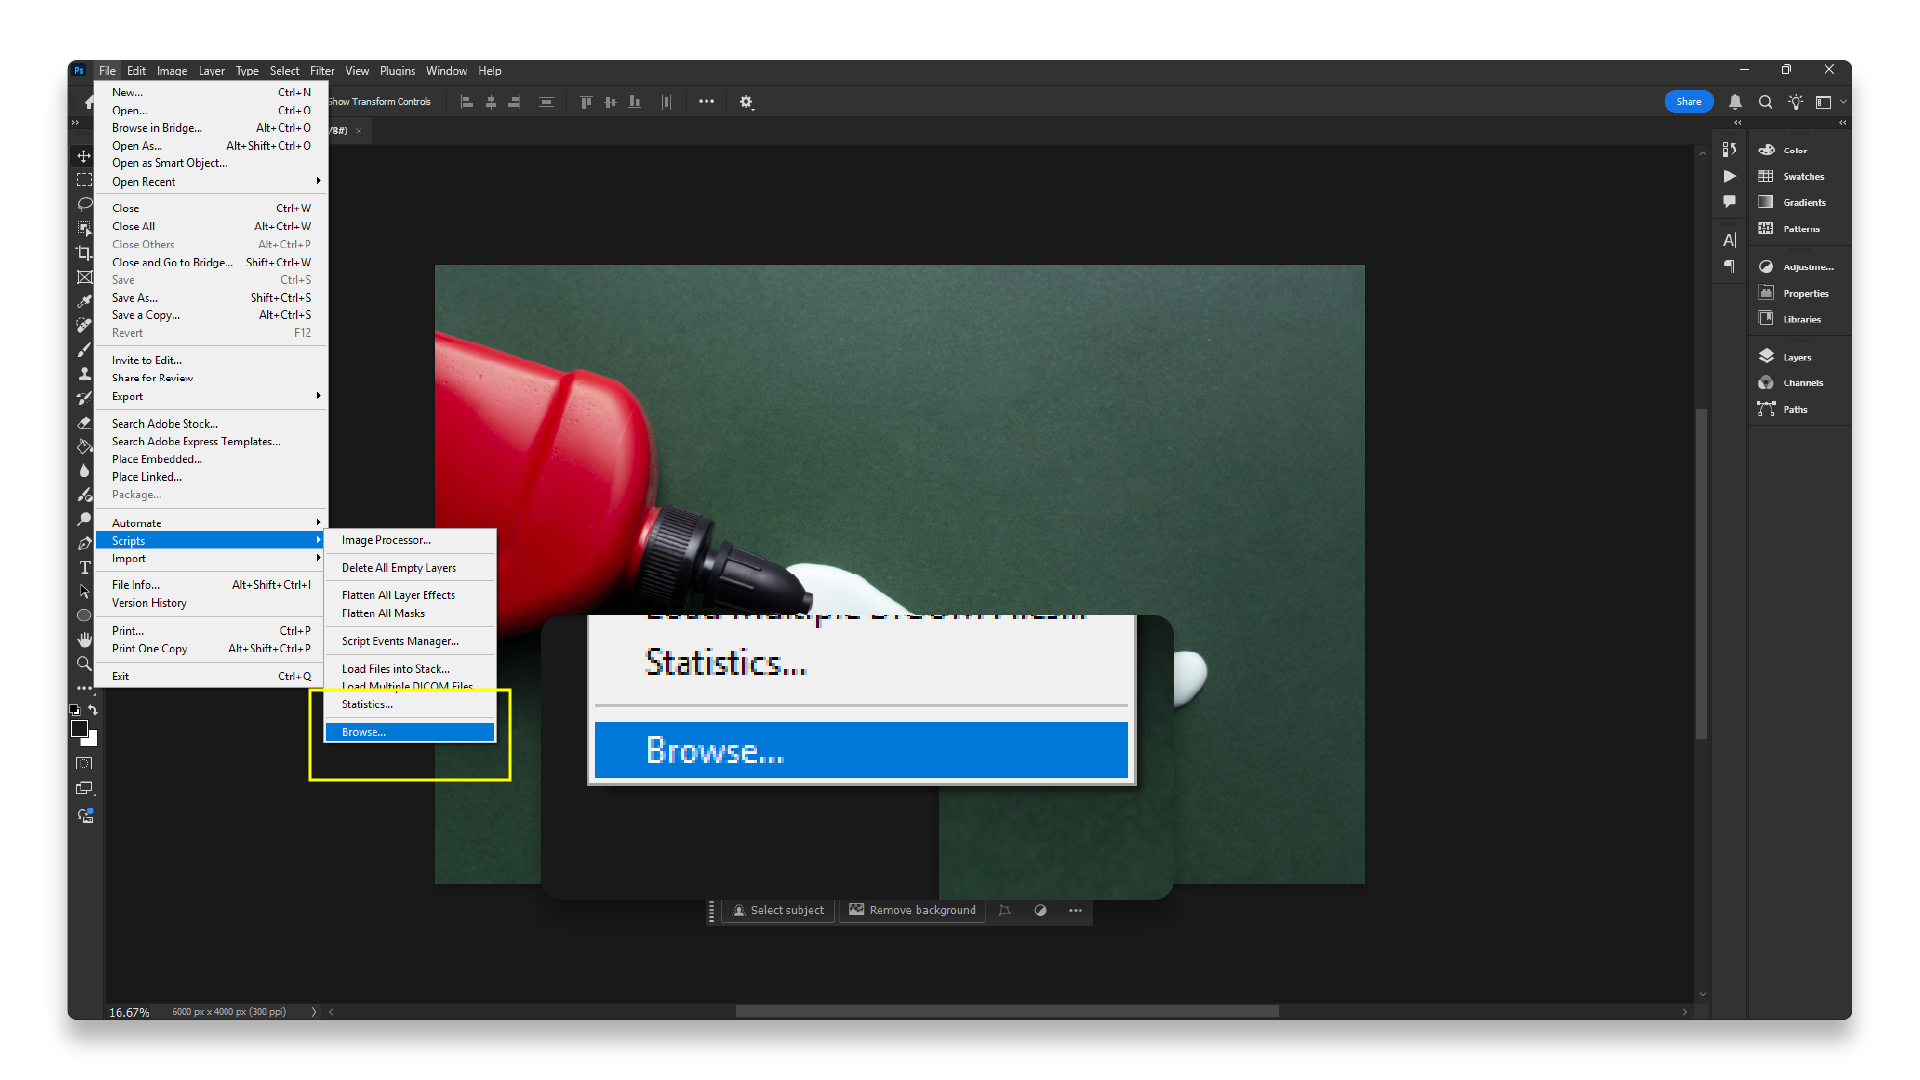
Once the JavaScript loads, stop your recording.
Batching Images
Once you create your action, you start automating your action across your folder structure.
Step 1: Open Photoshop Image Processor
To open up Image Processor, go to File > Script > Image Processor.
Note: Image Processor is the only automation in Adobe Photoshop that can read and run the JavaScript file.

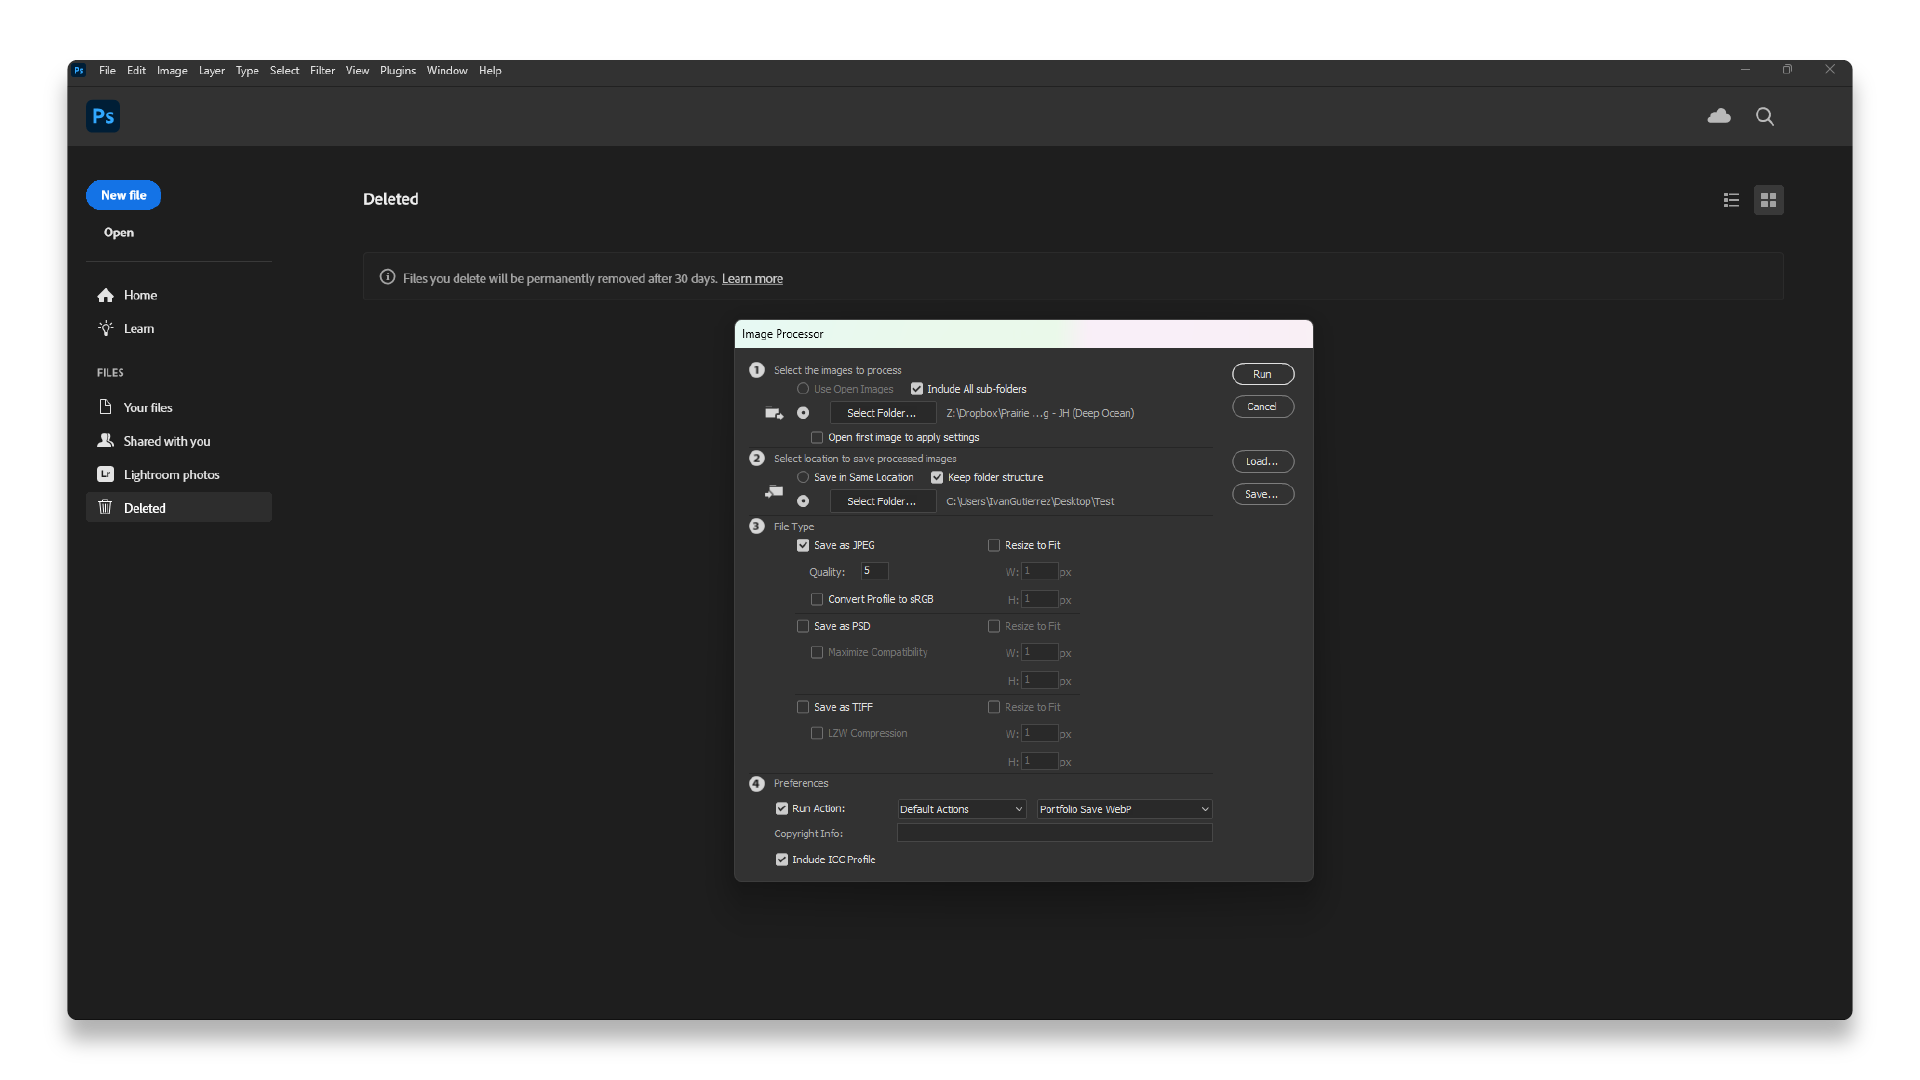
Step 2: Configuring Settings
Once you have the Image Processor pop-up, adjust the settings to your needs. Select the folder you’d like to process and its output. I recommend choosing the top-level folder structure to automate. For example, if your folder structure is Portfolio Gallery > Project 1 >Images, I would select Portfolio Gallery. This ensures that if there are multiple projects inside the portfolio gallery, you can batch all of the targets in all of its subfolders, cropping all images inside.
Next, you want to select a location for the process’s images. You can save in the same location; I prefer creating another folder to keep edited images and originals separately (and toggle “keep folder structure”). The “Keep Folder Structure” toggle preserves the original folder structure, and keeps the original and edited photos separate.
Adjust your file to your output needs, whether you want JPEG, PSD, or TIFF. Avoid adjusting “Resize to Fit Settings,” as this will not adjust the output crop or size. If you want to change the output crop, you have to adjust the JavaScript code.
Lastly, you want to adjust the “Preferences” settings. This is the most crucial part of the setting because this will run the action that you recorded, so of course you want to make sure Run Action is toggled on. Then select the action that you created.
Note: Photoshop automatically sets your most recent action as the default action.
Step 3: Run the Image Processor
After your settings are set, run the “Image Processor” on your input folder. This may take a couple of minutes, but you can leave Photoshop running in the background.
Recap
To create an image crop automation based on an image’s orientation in Photoshop will have to:
- Create a JavaScript code.
- Record a Photoshop Action.
- Run an automation through Image Processor (recommended).


