
How to set up a Simple Post Filter with JetEngine
Once you have your posts page set up, you may want to allow your users to sort posts by categories. The best way to set up a post filter is to use Smart Filters through JetEngine.
Plugins/Setup
For this setup, you will need Elementor as well as Jetengine and Jet SmartFilters. You will also need more than one post and multiple taxonomies(categories) assigned to more than one post. This will ensure that when the filters are set up and added to the posts page, the filters show up and will sort your posts. In this example there are 3 posts with 3 separate taxonomies and 1 assigned to each.
Build your Filter
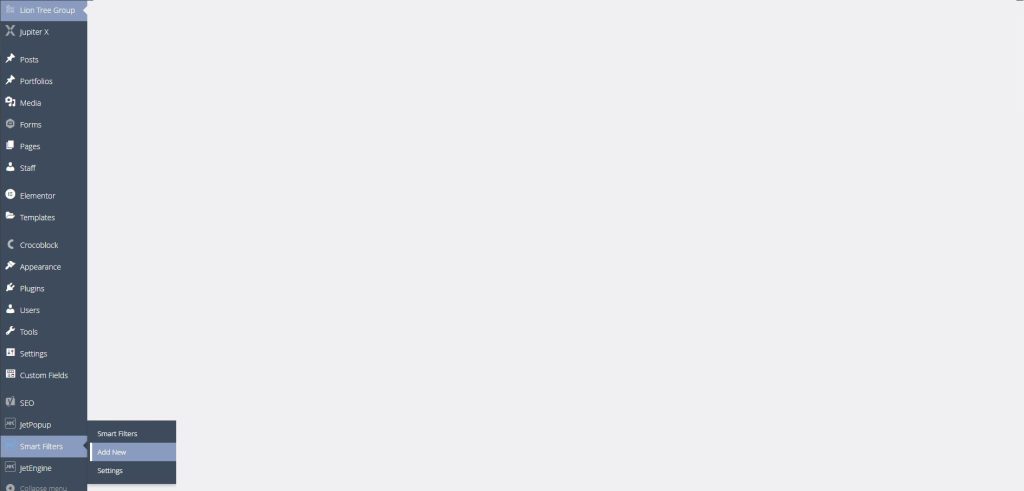
Go to the SmartFilters tab on the backend of WordPress and select “add new”. This will launch you into a setup screen.
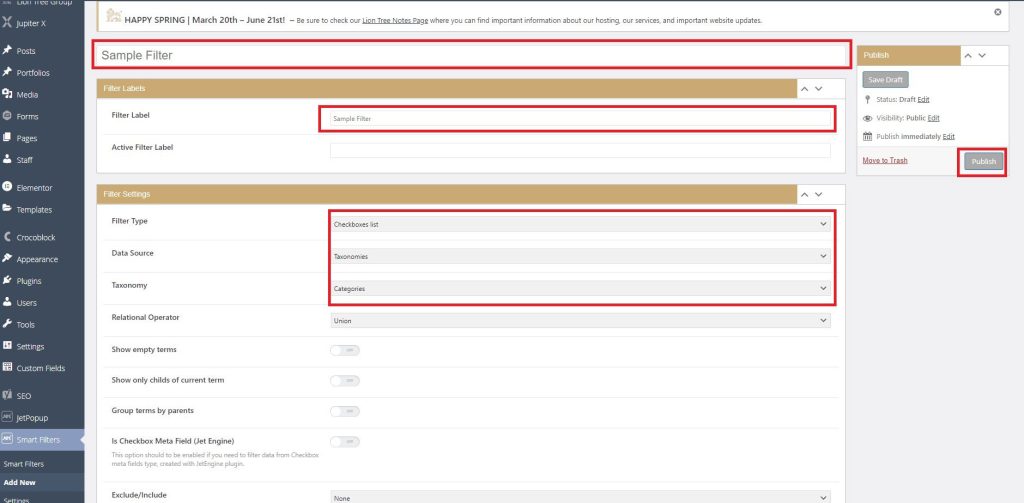
First set the name for your filter and the label name as well, the label name will help you find the filter once you have added it to your page. After that you can select the filter type. For this example, we’ll choose “checkboxes list”. Then select the data source, in this case it will be “categories”. Next, click “publish” and then navigate to your posts page.
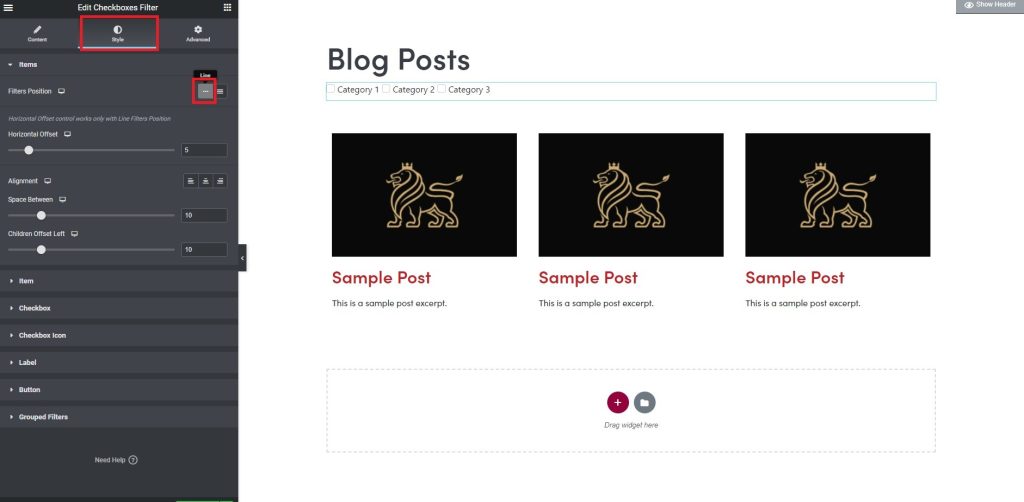
Adding the Filter to your page
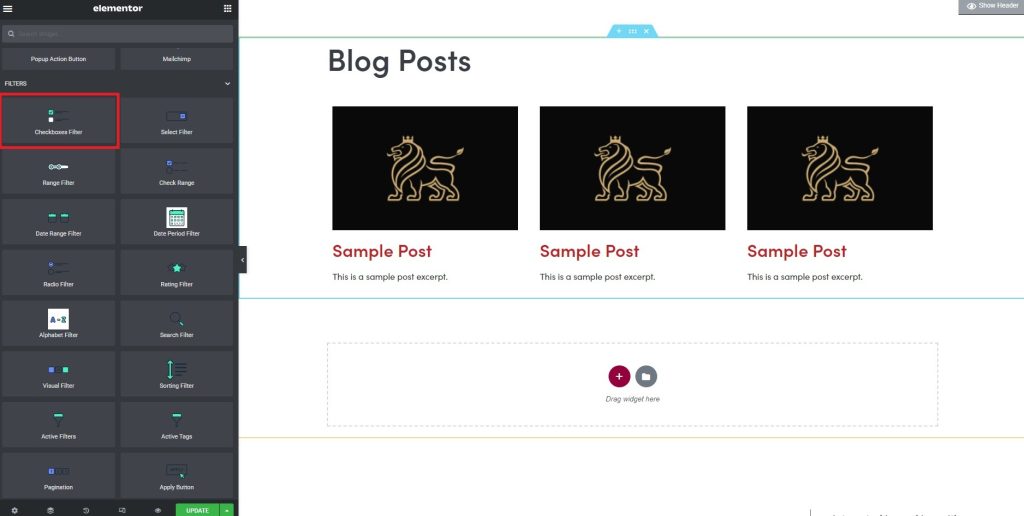
Once we’re on the posts page, let’s add the filter, go to the filters elements and drag the “checkboxes filter” onto your page, in this example we placed it above the post element. If you would like more information about customizing a posts element, check out our previous post on listing grids.
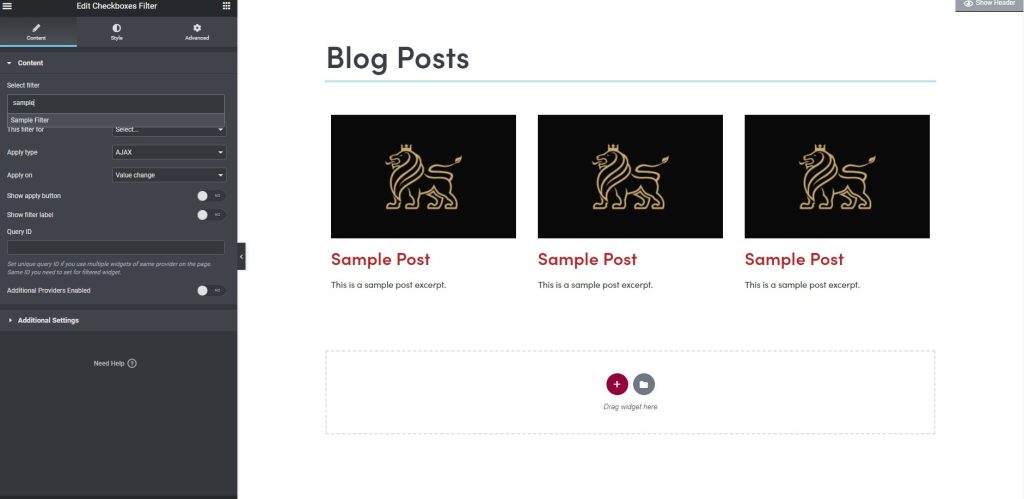
Now that we have our filter element on the page, let’s configure it, first select the filter you created in the first dropdown, and then in the “This filter for” dropdown, select JetEngine. This will tell the SmartFilter what type of element is being filtered, since we’re using a JetEngine listing grid here, JetEngine is the correct option.

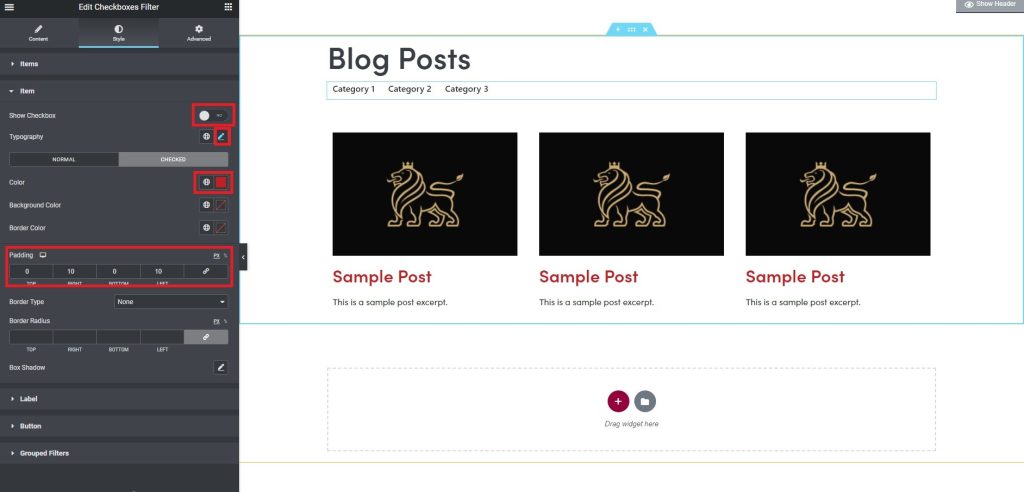
Next we’re going to add some styling to the filter, select the style tab and set the filters position to “line”, this will display them horizontally. Select the item dropdown, select “no” for show check box, on the checked tab, add a color to checked for differentiation and then add a little padding on the left and right of the items. You can add any other styling you want whether it be borders, font weight, icons or others. There are style many options available here so feel free to get creative with it and create something unique.
Finished Page
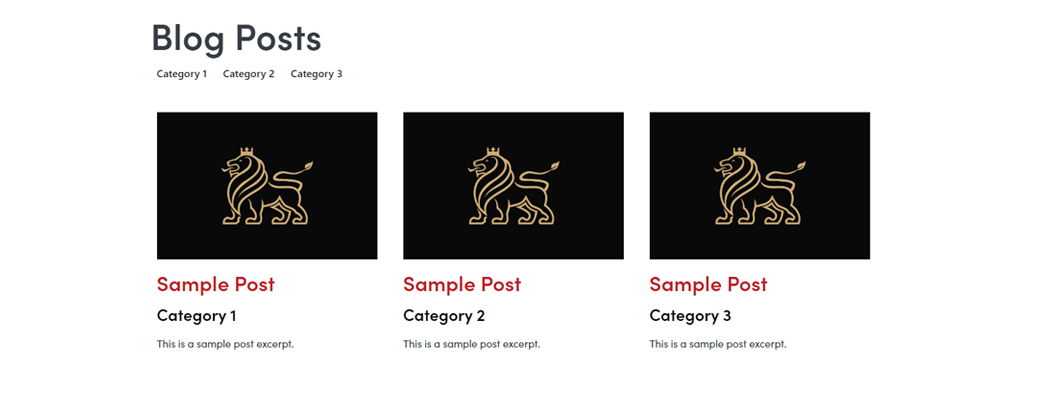
Now that the post filter is set up on your page you can click update and take a look at your new page. Your categories should be showing at the top and when you select the categories, it will sort your posts accordingly.


