
Fixing the This Page Can’t Load Google Maps Correctly Error
How to Fix the “This Page Can’t Load Google Maps Correctly Error” in WordPress
If you have a WordPress website and are using the standard WP Google Maps element, you might be seeing the “This page didn’t load Google Maps correctly” error for your location map. This error has become a lot more common since Google Maps started requiring a Google API key and Google Cloud Platform billing account to access the core Google Maps APIs on June 11, 2018. If you started using Google Maps on your website on or after June 22, 2016, then you will need to sign up for and implement an API key – if your map pre-dates that, it is grandfathered in and does not require an API key.

Google has not made setting up an API key very friendly for novice website users. Their interface is geared towards website developers and web designers. This guide is for WordPress website users that want to know how to fix the “This page didn’t load Google Maps correctly” error.
Create a Google Maps API Key
Follow these steps to create and implement a Google Maps API Key. Google typically allows up to 28,000 dynamic map loads every month for free – larger volume sites should evaluate pricing here.
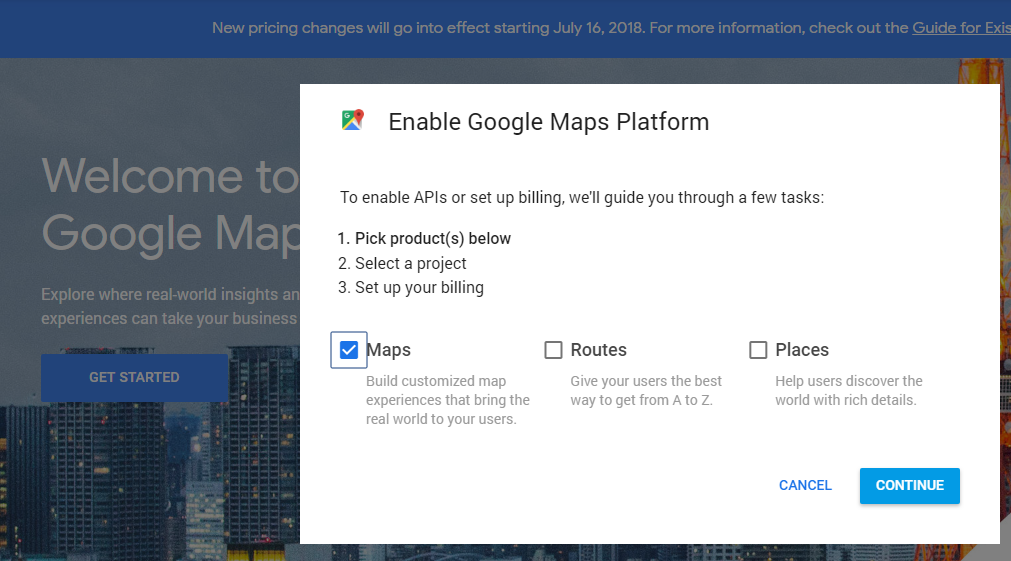
- Go to the Google Maps Platform welcome page then click Get Started.
- Choose Maps, Routes and Places (all three) then click Continue.

- Log into your Google Account or create a new one, if necessary.
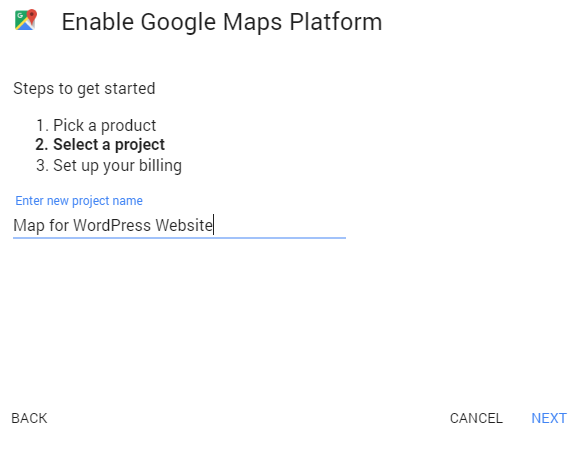
- Choose “Create a new project”, enter a name, then click Next.

- It will automatically take you to Set up Google Cloud Platform billing for your project then proceed to enable your APIs. You’ll need to enter a credit card for your account. Google offers a lot of free map views, so unless you have more than 20,000 monthly visitors, you shouldn’t have to worry about seeing any billing from Google Cloud.
- Click the API Console link to restrict your key’s use to your website only (important).
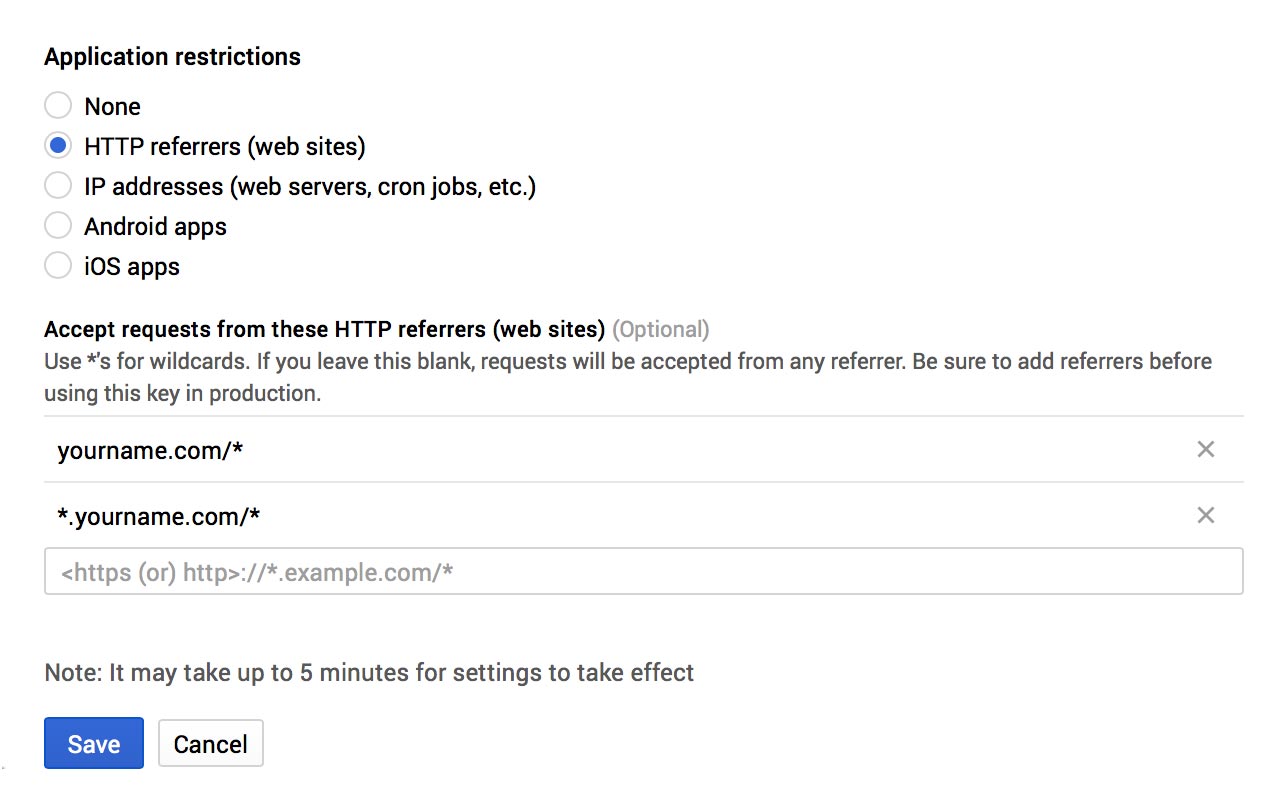
- Under Application restrictions, choose “HTTP referrers (web sites)” then add the two entries below (replacing yourname.com with your own domain). Type the first entry then hit enter on your keyboard to add it. Repeat to add the second entry. Having both entries (with asterisks) will help ensure your maps work on any URL of your website. Be sure to use multiple entries including www.yourwebsite.com*, yourwebsite.com/*, *yourwebsite.com/*, and *.yourwebsite.com/* and to include http:// or https:// correctly.

- Click Save then copy your key that is now shown on the screen.


Add the Google Maps API to WordPress
Now you can add your Google Maps API. In your WordPress theme options, find the API integrations, enter the key, and then click Save Changes. Don’t forget to add that missing Analytics ID while you’re at it!

In Conclusion
We hope Google will improve the process of creating an API key now that they have made it a requirement for millions of user-maintained WordPress Development sites, but hopefully this guide will give you some hope until that happens.
Other Popular Articles from Lion Tree Group
Adding Spaces Between Paragraphs or Bullet Points in WordPress
Creating Custom Bullet Point Lists in WordPress
How to Make Revolution Slider Look Better on Mobile
ABOUT THE AUTHOR
Ben Lindberg, CR is a partner in Lion Tree Group, a marketing agency in Madison, WI. His expertise is in multi-platform brand messaging for clients in construction, legal, health clubs, manufacturing, and dentistry. His agency specializes in digital website design and branding face lifts. He regularly blogs on his company’s blog: The Bark and Roar.


